August 8, 2014

Have Fresh Eggs, Have Fresh Veggies ~ It's Time for OKONOMIYAKI


The ducks and chickens are giving us so many eggs! This spring's Buff Orpington chicks just began laying today ... one beentsy little egg in the nesting box ~ the size of a large grape ~ tells me that they're coming online. By late November, the newest chicks on the block ~ our surprise batch of bantam babies ~ will be giving us some green eggs to go with our Christmas ham. When a person has chickens (and fowl) and a productive garden, you have to get busy and creative to use up all the goodness coming into the kitchen. 

As a big fan of Asian cuisine, one of the recipes I turn to for using up all the bounty is one from Japan. Okonomiyaki are Japanese savory "pancakes" which have an egg base and a few key ingredients which make up the traditional batter. But, from there, the additions can be as varied as you can imagine. It's the perfect recipe for using up extras, leftovers and overloads you may find yourself with. Okonomiyaki literally translates as: "how you like it, grilled/cooked". Perfect!


The beauty of okonomiyaki is that they freeze very well. No worries about making a big batch of one or more variations. Properly packed, the leftover pancakes will wait up to 3 months in your freezer. Flash fry or bake them back to crispness (DON'T microwave them or you'll be eating rubber Frisbees), drizzle with okonomi sauce and maybe some Japanese-style mayo and you have an almost instant (and fairly healthy) meal! Give it a try and have fun with it.

** Using dashi is best, but you can use just plain water, too. Napa cabbage and green onions are in every recipe, but the rest of the additions are up to you! Dashi and Okonomi sauce are available at Asian groceries and some grocery stores.


OKONOMIYAKI

Basic Batter:

6 large eggs
1 ½ c. cold water
1 packet Dashi powder or granules (Japanese soup stock)
2 c. flour
1 t. salt

In large mixing bowl, combine cold water and dashi powder and whisk to mix. You can also just use plain water or cold vegetable stock. Add eggs and salt, whisking to completely combine. Add flour and whisk until nearly smooth. Let batter rest while you prepare your pancake additions.


1 ½ c. shredded napa cabbage
1/3 c. chopped green onions
__________
Shredded zucchini
Fresh or frozen peas (thawed)
Finely shredded carrot
Roasted red pepper
Shredded daikon radish
Fresh shiitake mushrooms
Sliced kamaboku (fish cake)
Bay scallops
Cooked chicken or pork, chopped
Smoked salmon
Cheese
Salad shrimp or chopped prawns

** All okonomiyaki have shredded cabbage in them. All the other additions are your choice. Okonomiyaki literally translates as : cooked as you like it! Just remember that, whatever your ingredients, they must be in small enough pieces to cook thoroughly in the short time it takes to make the pancake. Do not use uncooked meats or fish unless they are very small pieces, such as the small scallops or pieces of small, raw shrimp.
Peanut oil is recommended for frying – it gives a nice crust and is a lighter oil so the pancakes don’t become heavy or saturated with oil.

Serve hot, drizzled with Okonomi sauce. Popular additional toppings are Japanese mayonnaise  +/- hot chili paste.

Makes 8-12 pancakes


February 27, 2014

~ SPRING IS TEASING ~

Last spring's starts

The weather this week has been in the fifties, with a few perfect, sunny days. The smell of warming earth is heady and hopeful. My garlic is already up three inches in the starter pots in the greenhouse and five inches out in the garden. I like Rocambole (hard neck) types of garlic and have chosen German Red and Duganski varieties to grow this year. The radishes have already sprouted in my containers in the greenhouse, with spinach, arugula and cilantro close behind.
Ever since January, the seed catalogs have been filling up the mailbox like crazy, much to my delight. The x's and circles proliferate until I just know I have to cut down and get real! It's so hard to choose! I also save seeds from previous seasons so I have my own stock to grow on. 
I run a sustainable living group on Meetup called Urban Farmers and for the last two years, we've had seed exchanges in late winter. The beauty of it is that you can share your extras with others and get seeds in return, for more variety than you could have in buying everything yourself. I mean, not many of us are going to plant 25 pumpkin hills, right? After the seed swap, I am all set! Some unusual varieties to try this year, including some Dutch brown beans called Kapuciner beans. They're a small, brown, wrinkly bean used as a dried type. I've seen them for sale in Europe, but never here. The man who brought them is from Holland and these seeds are sixth generation. He included a recipe with each packet! He also brought seeds for "feldsalat" also known as mache or corn salad. Another thing that one has to grow in the U.S. if you want to eat it. It's a common leaf green in Europe and I eat a lot of it when I'm there, but it isn't yet available much for purchase here. 
This year, our raised beds will be built and the field will get partially plowed so, in addition to the greenhouse, I'll have good growing areas outdoors. With the drought in California seriously threatening general produce supply, it's more important than ever to try to be as self-sufficient as possible. Besides, it's hard to beat the satisfaction of seed - to plant - to harvest when you do it yourself. And the taste ... well, no contest! 
Okay, spring...I'm ready! What will you be growing this year? 

June 21, 2013

Feasting by Foraging

Yellow-cracked bolete, Porcini, Gem-Studded Puffballs, Lion's Mane Mushroom

I'm happy that foraging is coming back around to being acceptable. For a long time in this country, foraged foods were equated with poverty and want. People who ate "weeds" were thought to be a bit nuts, put in a category of crazy naturalists. I never understood this stigma. Having grown up in a household with a European background, and a healthy dose of science thrown in, foraging was a natural and smart thing to do. If there is food growing outside your door, why not use it? 

In many cultures, foraging is considered a fun, healthy and sometimes competitive pursuit. In some places, foraging is a necessary part of survival. Nature provides, we partake. None of this is crazy, it's just common sense. 

Huckleberries

Razor Clams, after blanching

Rosehips in Syrup

When I travel to Europe to visit various friends, I always make note of the season and what might be ripe for foraging. My friends and I plan hikes and trips around what we can find. In Germany in spring, we look for bärlauch, a wild leek akin to our ramps; mushrooms like morcheln (morels) and puffballs; cattail tubers; and dandelions - dente di leone in Italian, Löwenzahn in German and dent-de-lion in French. Many cafe menu boards advertise dandelion salad in the spring. And it isn't cheap! All these things can be found here, too. Summertime brings marshmallow plant (malva); wild fennel and wood sorrel; nettles; sea beans (salicornia); and salmon berries, blackberries and wild tayberries. Autumn's haul is full of mushrooms of many varieties; rose hips; seaweeds and shellfish. Every season, in every climate, there are wild foods to be found and eaten.

Fresh Seaweed for soup

Free food you've found yourself always tastes better, somehow.


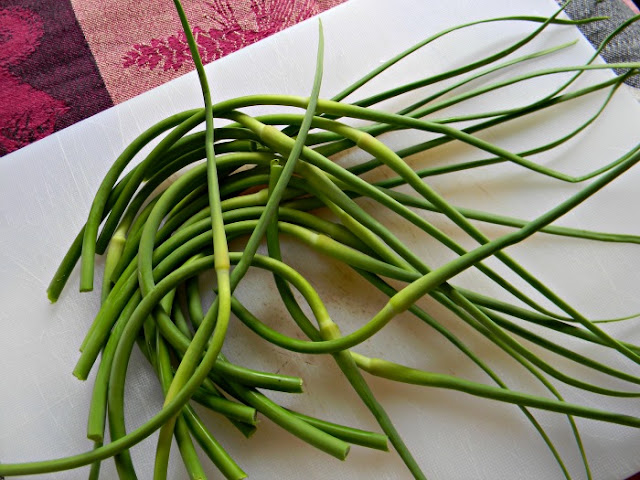
Garlic Scapes ~ In Season Now


It's time for fun, curly garlic scapes ~ the long, leafless flowering stem rising directly from the garlic's bulb. Garlic scapes must be removed soon after they appear, to allow the garlic bulb to fully form. Once the flower heads become enlarged or open, the scapes become tough, the garlic bulb will be depleted and not size up the way we expect. Snip them early and you'll have an additional crop from your garlic plants. 

Garlic scapes can be used in a stir fry - they pair with asparagus very well - or made into a pesto, pureed and added to potato soup or as I used them today ... in a compound butter, Maître d'Hôtel style. A variation on the classic flavored butters, this is wonderful served on steamed vegetables, fish, chicken or steak.I like it spread on a baguette or used for garlic bread. For another recipe, please see: http://passionate-psyche.blogspot.com/2011/07/whirly-curly-garlic-scapes_03.html


GARLIC SCAPE BUTTER

1 cube (1/2 c.) salted butter, cut into pieces
3 T. fresh parsley leaves
Juice of 1/4 of a small lemon
2/3 c. garlic scapes, chopped

Place butter pieces, parsley leaves and lemon juice into a food processor. Snap garlic scapes below the blossom end, discarding the ends. Chop stems into 1/2 inch pieces and add to bowl of processor. Pulse until butter and herbs are fine and well mixed. Scoop butter into a serving dish or form into a log with plastic wrap, to be sliced into pats. Excellent on grilled meats, vegetables and on crusty bread. 
Store for up to 3 weeks in the refrigerator.
♦  ♦  ♦

June 20, 2013

POMPANO ~ A fish plump & rich


Have you tried pompano fish? I've seen these plump, substantial fish in the markets - mostly Asian ones - thinking that they looked like they'd be tasty. It took me long enough, but when I finally bought a fresh one, I found that tasty was exactly right! Cute little guy, isn't he?

The fresh pompano fish that we get here in the U.S. are usually from the Gulf, hence known as Florida pompano. Part of the jack family (like mackerel), they're between 2 and 3 pounds, prefer warm waters (70-90º F), have a lifespan of 3-4 years and reach full size quickly, which makes them a good choice for sustainable seafood. They are fast swimmers, found in large schools and are strong fighters on the fishing line. Their skin looks like shimmering silver lamé, with yellow highlights and has such fine scales that it need not be scaled before cooking. 

The taste ~ it is its own flavor, rather like salmon has its own flavor and would never be confused with another fish, pompano is like that, too. It's oily (lots of Omega oils), rich, fishy (that's what I like about it), firm-fleshed and easy to eat off the bone. It's nice to cook it in a way that shows off its beautiful skin - barbecuing, broiling or baking it. One of the most famous ways to cook it is New Orleans style - en papillote (in parchment). I chose to grill it, slashing the skin and giving it a simple dressing with lemon, butter and chives stuffed in the cavity. I didn't want to overwhelm the true flavor of the fish. 

Give it a try ~ you may find you have a new favorite.


May 10, 2013

Making Chive Blossom Vinegar


The sunny days woke up the chives and suddenly the clump was full of pink blossoms. Since I needed to cut them out anyway to keep the chives producing, I figured I may as well do something with them. A few flowers went into our salad and the rest went to making chive blossom vinegar. It's super easy and quick and makes a beautifully-colored vinegar that's flavored subtly of onion. It's great in a vinaigrette and in marinades, especially for chicken or fish. If you have some chives in bloom, give this a try! I used my friend Theresa's honey for this and it made it that much more special. It's pretty cool having a beekeeper as a friend!


~ CHIVE BLOSSOM VINEGAR ~

12 oz. rice vinegar or white wine vinegar
1 1/2 c. chive blossoms
1 T. honey
& a pint-sized canning jar

Snip the chive blossoms from the stems. Rinse them only if necessary. Put them into a clean, pint-sized Mason jar. In a small saucepan, heat the vinegar until barely simmering. Stir in the honey until dissolved. Remove from heat and pour the hot vinegar over the chive blooms. Screw on the lid and turn the jar upside down on the counter and leave for 30 minutes. Turn the jar over every 30 minutes for a total of four times. You'll see the color changing soon. After 72 hours or so, you can strain out the chive blossoms, as they have imparted all their flavor by then, but I usually leave a few floating in the vinegar just because they're pretty and remind me of where the vinegar started :-)


May 9, 2013

~ Sangria on a Warm Evening and ... What's Old is New Again ~


Our New Old House

I've been on a bit of a hiatus from my food blog while buying and renovating a 1935 farmhouse these past months. But, now that things have moved into springtime, with all it entails on the farm and in the garden, I'm back and feeling so excited about all that's ahead. 


The new kitchen is gorgeous (still can't believe it's mine!) and the Verona Italian stove is an absolute dream. I've been putting it through its paces and still have several settings to try out. Don't worry, there are recipes, photos and stories to come! Last week I spent a full day of cooking with a friend, making big pots full of hot sauces and bbq sauce. We tinkered and tasted, wrote notes and came out with some amazing, unique flavors.  


One-half of the kitchen

When I'm not in the kitchen, I'm in the greenhouse - a new, 10 x 12 - and it's already filling up! Though I've had a greenhouse in the past for seed starting and overwintering plants, I've never experimented with growing food in it from seed to harvest. We've already had a batch of spinach, some napa cabbage and one ripe strawberry!  


The fuchsias do not impress him

The May weather has been unseasonably warm - in the 80's! - so I decided I needed a refresher one evening. I got out the libations, fruit and some lemon verbena ... oh, what a marvelous scent ... and muddled and poured my way to some sipping bliss. Serve it well chilled and don't drink it too fast or you may wake up in the flowerbed. 


Sangria Sipper - careful, it sneaks up on you!

~ Sangria Sipper ~

1/2 ripe ruby red grapefruit, juiced
1 ripe orange
1 lemon
1 lime
2 oz. Lemoncello liqueur, chilled
2 oz. dry Vermouth, chilled
12 lemon verbena leaves (or 6 bergamot leaves), plus some for garnish
1 bottle dry Riesling, chilled
16 oz. club soda, chilled

Pour fresh grapefruit juice into a pitcher. Slice orange, lemon and lime in half. Juice half of each one, adding the juices to the pitcher. Slice the other citrus halves. Add Lemoncello and dry Vermouth to pitcher, one slice each of orange, lemon and lime and the lemon verbena leaves. Using a muddler or the end of a thick wooden spoon, muddle the ingredients in the pitcher by bluntly bashing down on the fruit and herb leaves just to release oils and fragrance - about ten times. Pour Riesling and club soda into the pitcher and stir gently to mix. Put fruit slices into or on glasses, along with an herb leaf or two and crushed ice, if desired. Pour Sangria, cool and relax :-)

Serves 4


ShareThis

Creative Commons License
Aspenglow / Buttered Lips by Gayle Nabrotzky is licensed under a Creative Commons Attribution-NonCommercial-NoDerivs 3.0 Unported License.
Permissions beyond the scope of this license may be available at www.passionate-psyche.blogspot.com.